
Hoover SteamVac Instruction Manual: A Comprehensive Guide
Welcome! This manual provides detailed instructions for optimal performance and longevity of your Hoover SteamVac carpet cleaner. Read carefully before use.
Congratulations on purchasing a Hoover SteamVac! You’ve invested in a powerful and versatile cleaning solution designed to revitalize your carpets and upholstery. This machine utilizes the power of steam to effectively lift dirt‚ stains‚ and allergens‚ leaving your home feeling fresh and clean.
The SteamVac isn’t just for carpets; its attachments allow for cleaning of various surfaces‚ including stairs‚ furniture‚ and even hard floors. Before you begin‚ take a few moments to familiarize yourself with this instruction manual. Understanding the features and proper operation of your SteamVac will ensure optimal cleaning results and extend the life of your appliance.
We’ve designed this guide to be comprehensive and easy to follow‚ covering everything from initial setup to troubleshooting common issues. Let’s get started on your journey to a cleaner‚ healthier home!
Unboxing and Component Identification
Carefully unpack your Hoover SteamVac and verify that all components are present. You should find the main machine body‚ the clean water tank‚ the dirty water tank‚ the specialized cleaning solution‚ a hose‚ and a variety of attachments designed for different cleaning tasks.

Inspect each part for any signs of damage during shipping. If anything is missing or damaged‚ contact Hoover customer support immediately. Familiarize yourself with the location of key features on the machine‚ such as the power switch‚ solution tank access‚ and brush roll compartment.
Refer to the included parts diagram for a visual guide to component identification. Proper identification of each part will be crucial for assembly‚ operation‚ and future maintenance of your SteamVac.
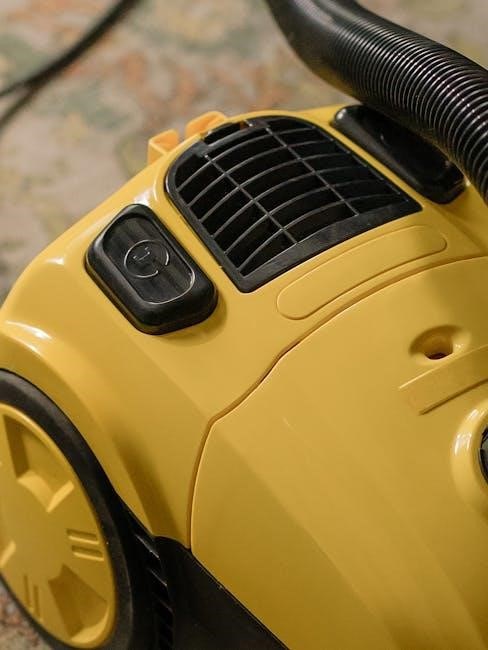
Machine Body & Key Features
The Hoover SteamVac’s machine body houses the motor‚ pump‚ and internal heating element responsible for generating the cleaning solution’s heat. Locate the power button‚ typically found on the handle‚ for easy operation. Note the solution trigger‚ which controls the dispensing of cleaning fluid during operation.
Observe the tank attachment points – these securely hold the clean and dirty water tanks. The brush roll access panel allows for inspection and maintenance of the rotating brush. The hose connection port is where the cleaning hose attaches‚ providing suction and solution delivery.
Familiarize yourself with the carrying handle for portability. The machine’s weight is substantial‚ so use caution when lifting or maneuvering. Understanding these key features will enhance your cleaning experience.
Tank Assembly & Water Reservoir
The Hoover SteamVac utilizes two separate tanks: one for clean water and cleaning solution‚ and another for dirty water extraction. Ensure both tanks are properly seated and locked into place before operation; a secure fit prevents leaks during cleaning. The clean water tank features a maximum fill line – do not exceed this level.

The water reservoir is designed to hold both warm water and your chosen cleaning solution. Using warm (not hot) water enhances cleaning effectiveness. The dirty water tank has a wider opening for easy emptying and features a float that indicates when it’s full.
Regularly inspect the tanks for cracks or damage and replace if necessary. Proper tank assembly is crucial for optimal performance.
Cleaning Solution Compartment
Located within the clean water tank‚ the cleaning solution compartment is specifically designed for adding Hoover-approved cleaning solutions. Never use soaps‚ detergents‚ or other cleaning agents not recommended by Hoover‚ as these can damage the machine or leave residue on your carpets.
The compartment is clearly marked with fill lines indicating the appropriate amount of solution to use based on your desired cleaning strength – light‚ normal‚ or heavy soil. Always follow the solution manufacturer’s dilution instructions.
Overfilling the compartment can lead to excessive sudsing and reduced cleaning performance. Ensure the compartment is securely closed before operating the SteamVac. Regular cleaning of the compartment prevents buildup and ensures optimal solution dispensing.
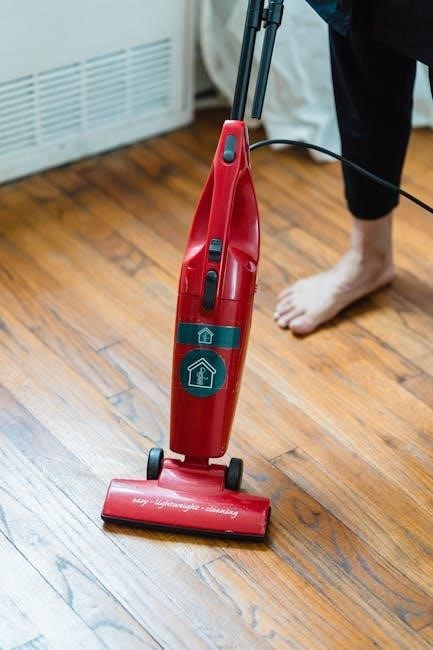
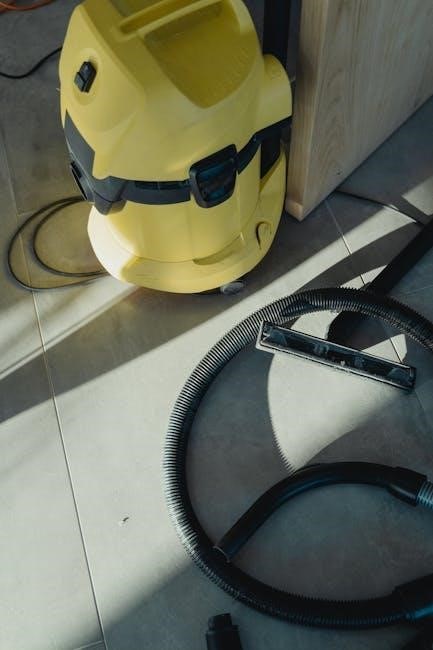
Hose & Attachments – Overview
Your Hoover SteamVac comes equipped with a flexible hose and a variety of attachments to tackle diverse cleaning needs. The hose connects securely to the machine body‚ providing reach and maneuverability. Inspect the hose regularly for any cracks or damage before each use.
Included attachments typically comprise a crevice tool for tight spaces‚ an upholstery tool for furniture‚ and a stair tool for effective stair cleaning. Each attachment easily clicks onto the hose for quick changes.
Proper attachment selection is crucial for optimal cleaning results. Store attachments neatly when not in use to prevent damage and ensure they are readily available when needed. Refer to the dedicated sections for detailed usage instructions for each attachment.
Safety Precautions & Warnings
Before operating your Hoover SteamVac‚ carefully review these essential safety guidelines. Always disconnect the machine from the power outlet before performing any maintenance or troubleshooting. Never operate the device with a damaged cord or plug.
Avoid using the SteamVac outdoors or on wet surfaces. Ensure the area is well-ventilated during and after cleaning. Do not allow children or pets to operate or be near the machine while in use.
Only use approved cleaning solutions specifically designed for carpet cleaners. Misuse can cause damage or injury. Read and understand all warnings and instructions provided in this manual and on the machine itself.
Electrical Safety Guidelines
To prevent electrical shock‚ never immerse the Hoover SteamVac‚ its cord‚ or plug in water or other liquids. Always unplug the machine from the electrical outlet when not in use and before performing any maintenance. Inspect the power cord regularly for damage; if damaged‚ it must be replaced by a qualified technician.
Do not operate the SteamVac with a damaged cord or plug‚ or if the machine malfunctions. Avoid using extension cords‚ but if one is necessary‚ ensure it is heavy-duty and properly grounded.
Ensure the electrical outlet is properly grounded and matches the voltage requirements of the machine. Keep the cord away from heated surfaces and sharp edges.
Usage Restrictions & Surfaces to Avoid
This Hoover SteamVac is designed for cleaning carpets‚ rugs‚ and select hard floors. Do not use it on delicate fabrics like silk or antique rugs‚ as damage may occur. Avoid cleaning unsealed hardwood‚ laminate‚ or vinyl flooring‚ as excess moisture can cause warping or discoloration.
Never use the SteamVac to clean flammable materials or liquids. It is not intended for commercial use. Ensure the area is well-ventilated during and after cleaning.
Avoid prolonged exposure to direct sunlight after cleaning‚ as this can cause fading. Always test a small‚ inconspicuous area first to ensure compatibility with the surface.
Child & Pet Safety Considerations
Keep children and pets away from the Hoover SteamVac during operation. The machine produces hot water and steam‚ posing a burn risk. Never allow children to operate the SteamVac unsupervised. Store cleaning solutions out of reach of children and pets.
Be mindful of the power cord to prevent tripping hazards. Ensure pets are secured in another room during cleaning to avoid stress or accidental contact with the machine or cleaning solution.
After cleaning‚ allow carpets to dry completely before allowing children or pets access to the area. Residual cleaning solution could be harmful if ingested. Always supervise and exercise caution.
Setting Up Your SteamVac for First Use
Before your initial cleaning‚ proper setup is crucial. Begin by carefully removing all packaging materials. Locate the clean and dirty water tanks – these are essential components. Ensure the machine is placed on a stable‚ level surface near a suitable power outlet.
Inspect the hose and attachments for any damage. Familiarize yourself with the connection points for the hose and various cleaning tools. We’ll cover filling the tanks and mixing the cleaning solution in the next steps‚ preparing for a powerful clean!
Double-check all connections are secure before powering on the device.
Initial Tank Filling & Solution Mixing
First‚ remove the clean water tank and fill it with warm – not hot – tap water. Avoid using excessively hot water‚ as it could damage internal components. Next‚ locate the separate cleaning solution compartment within the tank.
Carefully measure the recommended amount of Hoover SteamVac cleaning solution and pour it into the designated compartment. Do not overfill! Refer to the solution bottle for precise mixing ratios.
Securely reattach the clean water tank. The dirty water tank remains empty at this stage. Proper solution mixing ensures effective cleaning and prevents residue buildup.
Hose Connection & Attachment Selection
Begin by firmly connecting the hose to the main body of the SteamVac. Ensure a secure‚ click-lock connection to prevent detachment during operation. Next‚ select the appropriate attachment for your cleaning task.
For general carpet cleaning‚ the standard floor tool is ideal. For upholstery‚ choose the upholstery tool. Tight spaces benefit from the crevice tool‚ and stairs require the stair tool.
Attach the selected tool to the end of the hose‚ again ensuring a secure connection. Always double-check that attachments are firmly in place before powering on the machine. Incorrect attachment selection can reduce cleaning effectiveness.
Powering On & Initial System Check
Before powering on‚ verify the clean and dirty water tanks are correctly installed and contain the appropriate levels of solution and water. Plug the SteamVac into a grounded electrical outlet. Press the power button – it’s typically located on the machine’s body.
Listen for the motor to engage and observe the brush roll. It should rotate freely. Test the trigger to confirm solution is dispensing through the selected attachment.
Check for any leaks around the tanks‚ hose connections‚ and attachment points. If leaks are detected‚ immediately power off and address the issue before proceeding. A proper system check ensures safe and effective operation.
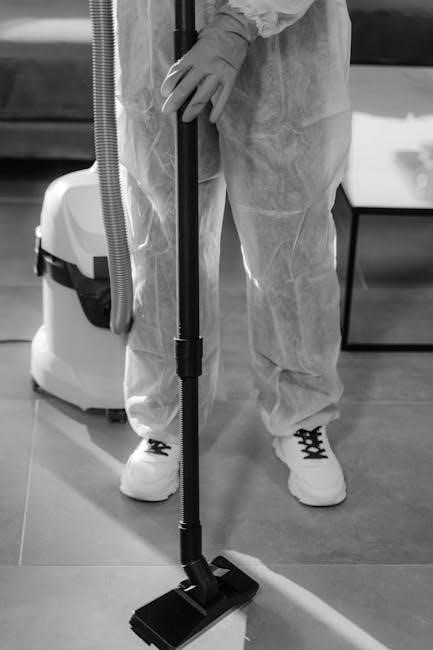
Operating Instructions: Basic Carpet Cleaning
Begin by ensuring the area is free of large debris. Select the appropriate cleaning solution for your carpet type and follow dilution instructions. With the SteamVac powered on‚ position the nozzle onto the carpet surface. Gently depress the trigger to release the cleaning solution.
Employ a slow‚ deliberate forward and backward motion‚ overlapping each pass slightly. Avoid prolonged soaking; the SteamVac is designed for controlled moisture. Release the trigger during backward passes to focus on suction and water extraction.
Continue this process across the entire carpeted area‚ maintaining consistent pressure and overlapping strokes for thorough cleaning. Regularly check the dirty water tank and empty when full.
Pre-Treatment for Stains (Optional)
For heavily soiled areas or stubborn stains‚ pre-treatment can significantly enhance cleaning results. Identify the stain type – whether it’s food‚ pet accidents‚ or general dirt – and select a corresponding pre-treatment solution specifically designed for carpets.
Apply the pre-treatment solution directly to the stain‚ following the product’s instructions regarding dwell time. Typically‚ allowing the solution to sit for 5-10 minutes helps break down the stain’s composition.
Avoid over-saturating the carpet; a light‚ even application is sufficient. After the dwell time‚ proceed with basic carpet cleaning using your Hoover SteamVac as described in the previous section. The SteamVac will then extract the pre-treatment solution and loosened stain residue.
Forward & Backward Cleaning Technique
Effective carpet cleaning relies on a consistent technique. Begin by slowly pushing the SteamVac forward‚ dispensing cleaning solution via the trigger. Overlap each pass by a few inches to ensure complete coverage and avoid leaving streaks.
Crucially‚ release the trigger on the return (backward) pass. This prevents over-wetting the carpet and maximizes solution efficiency. Continue this forward-push-with-solution‚ backward-pull-without-solution motion across the entire carpeted area.
Maintain a moderate pace; rushing can reduce cleaning effectiveness. For heavily soiled areas‚ repeat the process 2-3 times. Remember to regularly check the tanks and empty them as needed for optimal performance. This technique ensures a deep clean and quicker drying time.
Trigger Control & Solution Dispensing
Mastering the trigger is key to successful SteamVac operation. The trigger controls the release of cleaning solution onto the carpet. Press and hold the trigger only during the forward cleaning stroke‚ ensuring even distribution of the solution.
Avoid continuous trigger holding‚ as this leads to excessive wetting. A short‚ controlled press is sufficient for each forward pass. Releasing the trigger during the backward stroke is vital for effective suction and prevents saturation.
Experiment with trigger pressure to adjust solution dispensing based on soil level. For light cleaning‚ a gentle press suffices; for heavily soiled areas‚ a firmer press may be needed. Regularly monitor the solution tank level to prevent running dry during operation.
Utilizing Attachments for Specialized Cleaning
Expand your SteamVac’s versatility with the included attachments! These tools unlock cleaning potential beyond carpets‚ tackling upholstery‚ crevices‚ and stairs with ease. Before switching‚ always power off and disconnect the machine.
Securely attach the desired tool to the hose‚ ensuring a firm click. Adjust cleaning technique based on the surface. For delicate fabrics‚ use the upholstery tool with a gentle sweeping motion. The crevice tool excels at reaching tight spots‚ while the stair tool simplifies vertical cleaning.
Remember to adjust solution dispensing as needed for each attachment and surface type. Refer to the specific attachment guides for optimal results and avoid damage.
Crevice Tool – For Tight Spaces
The Crevice Tool is your solution for reaching those hard-to-access areas where dirt and debris accumulate. This narrow attachment is perfect for cleaning along baseboards‚ between furniture cushions‚ and in tight corners.

To use‚ firmly attach the Crevice Tool to the SteamVac hose. Apply moderate pressure and move the tool slowly along the targeted area. The concentrated suction power will effectively lift dirt and dust.
For optimal results‚ consider pre-treating stubborn stains in these areas with a suitable cleaning solution. Avoid using excessive moisture‚ especially on delicate surfaces. Regularly inspect the tool for clogs and clean as needed to maintain peak performance.
Upholstery Tool – For Furniture Cleaning
The Upholstery Tool is specifically designed for safely and effectively cleaning your upholstered furniture‚ including sofas‚ chairs‚ and loveseats. Its wider surface area allows for efficient cleaning of larger fabric areas.
Before use‚ always test the tool on an inconspicuous area of the fabric to ensure colorfastness. Attach the Upholstery Tool securely to the SteamVac hose. Use gentle‚ overlapping strokes‚ avoiding excessive saturation;
For best results‚ utilize the trigger control to dispense cleaning solution as needed. Allow the furniture to air dry completely before use. Regular cleaning with the Upholstery Tool will help maintain the appearance and hygiene of your furniture.
Stair Tool – For Effective Stair Cleaning
The Stair Tool is engineered to make cleaning carpets and rugs on staircases significantly easier and more effective. Its compact design allows for maneuverability on steps‚ reaching edges and corners with precision.
To begin‚ firmly attach the Stair Tool to the SteamVac hose. Start at the top of the staircase and work your way down‚ using overlapping strokes. Employ the trigger control to dispense cleaning solution evenly.
Pay attention to heavily trafficked areas and stains‚ applying slightly more pressure and solution as needed. Allow each step to dry thoroughly before walking on it. Consistent use of the Stair Tool will keep your stairs fresh and clean.
Maintenance & Cleaning After Each Use

Consistent maintenance is crucial for preserving your Hoover SteamVac’s performance and extending its lifespan. After every cleaning session‚ immediate attention to several key areas is required.
Begin by emptying both the clean and dirty water tanks. Rinse them thoroughly with clean water‚ ensuring no solution residue remains. Next‚ remove the brush roll and carefully clear away any accumulated hair‚ fibers‚ or debris.
Inspect the nozzles for blockages and clean as needed. Finally‚ detach the hose and attachments‚ rinsing them to prevent buildup. Proper storage in a dry location will further protect your investment.
Emptying & Rinsing the Tanks
Proper tank maintenance is essential after each use. First‚ detach both the clean and dirty water tanks from the machine. Carefully pour the dirty water tank’s contents down a suitable drain‚ avoiding spillage. Rinse the tank thoroughly with warm water‚ removing all traces of dirt and cleaning solution.
Repeat this process with the clean water tank‚ ensuring no residual solution remains. Inspect both tanks for any lingering debris and remove it. Allow the tanks to air dry completely before reattaching them to the Hoover SteamVac.
This prevents mold or mildew growth and ensures optimal cleaning performance during your next use.
Cleaning the Brush Roll & Nozzles
Regular cleaning of the brush roll and nozzles is vital for maintaining suction and cleaning effectiveness. Begin by disconnecting the power cord and accessing the brush roll compartment – refer to your machine’s specific diagram. Carefully remove the brush roll and clear away any accumulated hair‚ threads‚ or debris.
Inspect the nozzles for blockages and use a small brush or tool to remove any obstructions. Rinse both the brush roll and nozzles with warm water‚ ensuring they are completely free of residue. Allow all components to dry thoroughly before reassembling.
A clean brush roll and unobstructed nozzles guarantee optimal performance.
Hose & Attachment Storage
Proper storage of the hose and attachments prevents damage and ensures they are readily available for future cleaning tasks. After each use‚ detach the hose from the machine body and carefully coil it‚ avoiding any sharp bends that could cause cracking.
Store attachments together in a designated container or utilize the onboard storage features‚ if your model includes them. Keeping all components organized minimizes clutter and extends their lifespan.
Avoid storing the hose or attachments in direct sunlight or extreme temperatures‚ as this can degrade the materials. A cool‚ dry place is ideal.
Troubleshooting Common Issues
Encountering problems? This section addresses frequent issues and provides solutions to get your Hoover SteamVac back in working order. Before seeking professional help‚ review these troubleshooting steps.
If the machine fails to power on‚ first check the power cord connection and ensure the outlet is functioning. A tripped circuit breaker could also be the cause.
Reduced suction often indicates a full tank or clogged filter. Empty the tanks and clean or replace the filter as needed. Inspect the hose for blockages too.
For solution dispensing issues‚ verify the solution compartment is filled and the trigger is functioning correctly.
Machine Not Powering On
Is your SteamVac unresponsive? Don’t worry‚ this is a common issue with simple fixes. First‚ ensure the power cord is securely plugged into both the machine and a working electrical outlet. Test the outlet with another device to confirm it’s providing power.
Check your circuit breaker or fuse box. A tripped breaker or blown fuse can prevent the machine from powering on. Reset the breaker or replace the fuse if necessary.
Inspect the power cord itself for any visible damage‚ such as cuts or fraying. Do not use the machine if the cord is damaged. Finally‚ confirm the on/off switch is fully engaged.
Loss of Suction Power
Experiencing reduced suction? Several factors could be at play. Begin by checking the tanks – a full recovery tank or an empty clean water tank will halt suction. Ensure both are properly installed and within capacity.
Inspect the brush roll. Tangled hair‚ threads‚ or debris can obstruct its rotation‚ diminishing suction. Carefully remove any obstructions. Also‚ examine the hose for blockages; disconnect it and check for clogs.
Verify the filters are clean. Clogged filters significantly reduce airflow. Rinse or replace them as needed. Finally‚ confirm all connections are secure – a loose hose or attachment can cause suction loss.

No Solution Dispensing
If your SteamVac isn’t dispensing cleaning solution‚ start by confirming the solution compartment is adequately filled with the correct mixture. Ensure the solution selector dial is set to the appropriate position – not ‘Rinse’ or ‘Empty’.
Check for clogs in the solution line. Disconnect the hose and inspect the nozzle for any blockages. A buildup of detergent can restrict flow. Also‚ verify the trigger is fully depressed during operation.
Inspect the pump. Listen for a humming sound when the trigger is engaged; silence may indicate a pump issue. If problems persist‚ try descaling the internal system‚ as mineral deposits can impede solution flow.
Long-Term Maintenance & Care
To ensure your Hoover SteamVac continues to perform optimally over time‚ consistent long-term care is essential. Regularly descale the internal system – approximately every 25-30 uses‚ or more frequently in areas with hard water – using a commercially available descaling solution‚ following product instructions carefully.
Adhere to the filter replacement schedule; a clogged filter significantly reduces suction. Replace both the pre-motor and post-motor filters as recommended in the maintenance section.
Proper storage is crucial. Ensure the tanks are completely empty and dry before storing. Store in a cool‚ dry place‚ avoiding direct sunlight and extreme temperatures.
Descaling the Internal System
Mineral buildup from hard water can impede performance. To descale‚ begin by emptying and rinsing both the clean and dirty water tanks thoroughly. Prepare a descaling solution according to the manufacturer’s instructions – typically a mixture of descaling agent and water.
Pour the solution into the clean water tank. Run the SteamVac on a hard floor surface (avoid carpets during this process) for approximately 10-15 minutes‚ dispensing the solution as if cleaning. Repeat with clean water several times until no descaling solution remains in the system.
This process removes scale‚ restoring optimal steam and suction power.
Filter Replacement Schedule
Maintaining a clean filter is crucial for efficient operation and preventing motor damage. Your Hoover SteamVac utilizes both a pre-motor filter and potentially a post-motor filter‚ depending on the model. The pre-motor filter‚ responsible for capturing larger debris‚ should be checked after each use and cleaned or replaced as needed.
For optimal performance‚ replace the pre-motor filter every 3-6 months with regular use. The post-motor filter‚ protecting the motor itself‚ typically has a longer lifespan. Replace this filter every 6-12 months‚ or sooner if you notice reduced suction or a burning smell.
Always use genuine Hoover replacement filters to ensure proper fit and filtration.
Storage Recommendations
Proper storage extends the life of your Hoover SteamVac. Before long-term storage‚ thoroughly clean and dry all components – tanks‚ hose‚ and attachments – as detailed in the ‘Maintenance & Cleaning’ section. Ensure the tanks are completely empty to prevent mold or mildew growth.
Store the SteamVac in a cool‚ dry place‚ away from direct sunlight and extreme temperatures. Avoid storing it in damp basements or outdoors. Wrap the power cord loosely around the machine body to prevent damage. Secure the hose and attachments to the unit or store them separately in a clean‚ dry container.
Periodically check the stored unit for any signs of damage or deterioration.